Imagine serving a dish so elegant, so bursting with flavor, that your guests assume you’ve spent hours slaving away in the kitchen. Now, imagine achieving that culinary triumph in under half an hour. Impossible? Not when you master the art of grilling restaurant-quality lobster tails at home. This guide will reveal how easy it is to prepare succulent, smoky, butter-basted lobster tails that are ready to impress in just 25 minutes – making you a true grill-time rockstar!
Why Grilling Lobster Tails is Easier Than You Think
For many home cooks, the idea of grilling delicate seafood like lobster tails can conjure images of meat sticking stubbornly to grates, overcooking into rubbery disappointment, or even crumbling apart. It’s a common intimidation, one that I myself wrestled with. However, the truth is delightfully simple: grilling lobster tails is incredibly forgiving, much easier than you’d ever anticipate.
The secret lies in the lobster's natural armor. Unlike other seafood that requires meticulous handling to prevent sticking or drying out, the hard shell of the lobster tail acts as a protective barrier. This ingenious design shields the tender meat from the direct, intense heat of the grill, ensuring it stays beautifully juicy and succulent throughout the cooking process. It’s a built-in safeguard that makes grilling lobster tails a surprisingly stress-free experience, allowing you to focus on infusing that delicate meat with incredible flavor.
The Magic of the Shell
Think of the lobster shell not as an obstacle, but as a culinary ally. When prepared correctly, with the shell mostly intact, it forms a natural vessel. This protects the sweet meat from searing too quickly or sticking, while also acting as a perfect cradle for all that glorious basting butter. As the lobster cooks, the shell helps to steam the meat gently from the inside, while the grill grates impart a delicate smokiness from below. The result is a perfect balance of tenderness and flavor, a testament to the shell's unsung heroics.
Sourcing the Perfect Lobster Tails for Grilling
The foundation of any great dish begins with quality ingredients, and picking the best lobster tails is no exception. While fresh lobster is a true summer luxury, especially in coastal New England states like Maine, Massachusetts, and Connecticut during July and August, it’s not always readily available for everyone. Don’t despair if you’re not near a bustling seafood market; high-quality frozen lobster tails are an excellent and often more accessible option.
When purchasing frozen tails, always aim for those labeled as "cold water" lobster. This distinction is crucial, as it typically refers to species from regions like Maine, Canada, or Australia. Cold water lobster boasts sweeter, firmer meat that holds up beautifully to grilling and maintains its tender, chunky texture. Warm water varieties, often from the Caribbean or Florida, tend to be softer, sometimes a bit fishier, and less ideal for the impressive results you're aiming for. Always check the packaging for origin information!
If you opt for frozen lobster tails, proper thawing is key. The best method is to transfer them from the freezer to the refrigerator overnight. This slow, gradual thaw helps maintain the integrity and texture of the meat. Avoid quick-thawing methods like hot water, which can negatively impact the delicate texture.
Cold Water vs. Warm Water: Making the Right Choice
To reiterate, the provenance of your lobster tails significantly impacts the final dish. Cold water lobster, recognizable by its typically reddish-brown shell without spots, is the premium choice. Its meat is renowned for its sweetness and firm, resilient texture, perfect for grilling without fear of it falling apart. While often higher priced, the superior taste and mouthfeel are undeniably worth the investment for a truly restaurant-quality experience. For a deeper dive into making this crucial selection, read our guide on Cold Water vs. Warm Water Lobster: Pick the Best for Perfect Tails.
Preparing Your Lobster Tails for Grill-Time Glory
Prepping lobster tails for the grill is the most critical step to ensure even cooking and maximum flavor absorption. The goal is to expose the sweet meat for basting while keeping the protective shell intact. Don't worry, it's simpler than it sounds!
- Thaw Completely: If using frozen tails, ensure they are fully thawed. Gently pat them dry with paper towels.
- Butterfly the Shell: Using sturdy kitchen shears, carefully cut down the center of the top side of the shell, from the end of the tail fin to where it meets the body. Be careful not to cut through the meat itself.
- Loosen the Meat: Gently insert your fingers or a small spoon between the meat and the shell on both sides of your cut. Carefully loosen the meat from the shell, trying to keep it in one piece.
- Lift and Rest: Gently lift the meat out of the shell, keeping the end still attached to the tail fin. Press the two halves of the shell together underneath the meat, creating a "pedestal." This technique, often called "piggybacking," exposes the meat beautifully while allowing the shell to collect the basting butter and protect the underside.
- Rinse (Optional): Some people prefer to quickly rinse the exposed meat under cold water to remove any stray bits of shell or vein, then pat thoroughly dry.
With your lobster tails prepped, they're ready for their flavor bath!
Crafting the Irresistible Lemon Garlic Butter
Inspired by the simplicity and sublime flavor of Connecticut-style lobster rolls – famous for being served warm and drenched in melted butter – our grilled lobster tails shine with a similarly straightforward yet impactful lemon garlic butter. You only need a few high-quality ingredients to create a basting liquid that elevates the natural sweetness of the lobster without overwhelming it.
For a basic lemon garlic butter, you'll need:
- 1/2 cup unsalted butter, melted
- 2-3 cloves garlic, minced very finely
- 1-2 tablespoons fresh lemon juice (to taste)
- A pinch of red pepper flakes (optional, for a subtle kick)
- Salt and freshly ground black pepper to taste
Simply combine all ingredients in a small bowl. The acidity of the lemon brightens the rich butter, and the garlic adds a savory depth that perfectly complements the sweet lobster meat. This concoction is not just for basting; it's also the ideal dipping sauce once the lobster is cooked!
Grilling Lobster Tails to Perfection: The 25-Minute Method
Now for the main event! Grilling these exquisite lobster tails is surprisingly quick, making it an ideal choice for last-minute entertaining or a special weeknight treat. Here’s how to achieve perfection every time:
- Preheat Your Grill: Set your grill to medium-high heat (around 400-450°F / 200-230°C). For even cooking and to prevent sticking, clean your grates thoroughly with a wire brush and then oil them with a high-smoke-point oil (like canola or grapeseed oil) using a paper towel held with tongs.
- Place Lobster Tails: Place the prepared lobster tails, meat-side up, directly on the preheated grates. The shell will be facing down, protecting the delicate meat.
- Baste Liberally: Immediately brush a generous amount of your lemon garlic butter over the exposed lobster meat.
- Grill and Baste: Close the grill lid and cook for about 2-3 minutes. Open the lid, baste again, and close. Repeat this process every 2-3 minutes. The total grilling time for most medium-sized tails (about 6-8 ounces) will be around 8-12 minutes. Larger tails may take a few minutes longer.
- Check for Doneness: The lobster tails are cooked when the meat turns opaque white and is firm to the touch. The internal temperature, checked with an instant-read thermometer inserted into the thickest part of the meat, should register between 135-140°F (57-60°C). Avoid overcooking, as this is when lobster can become rubbery.
- Optional Finishing Touch: For an extra smoky flavor and beautiful grill marks, you can briefly flip the tails meat-side down for the last minute or two of cooking, but be mindful not to overcook.
Tips for a Flawless Finish
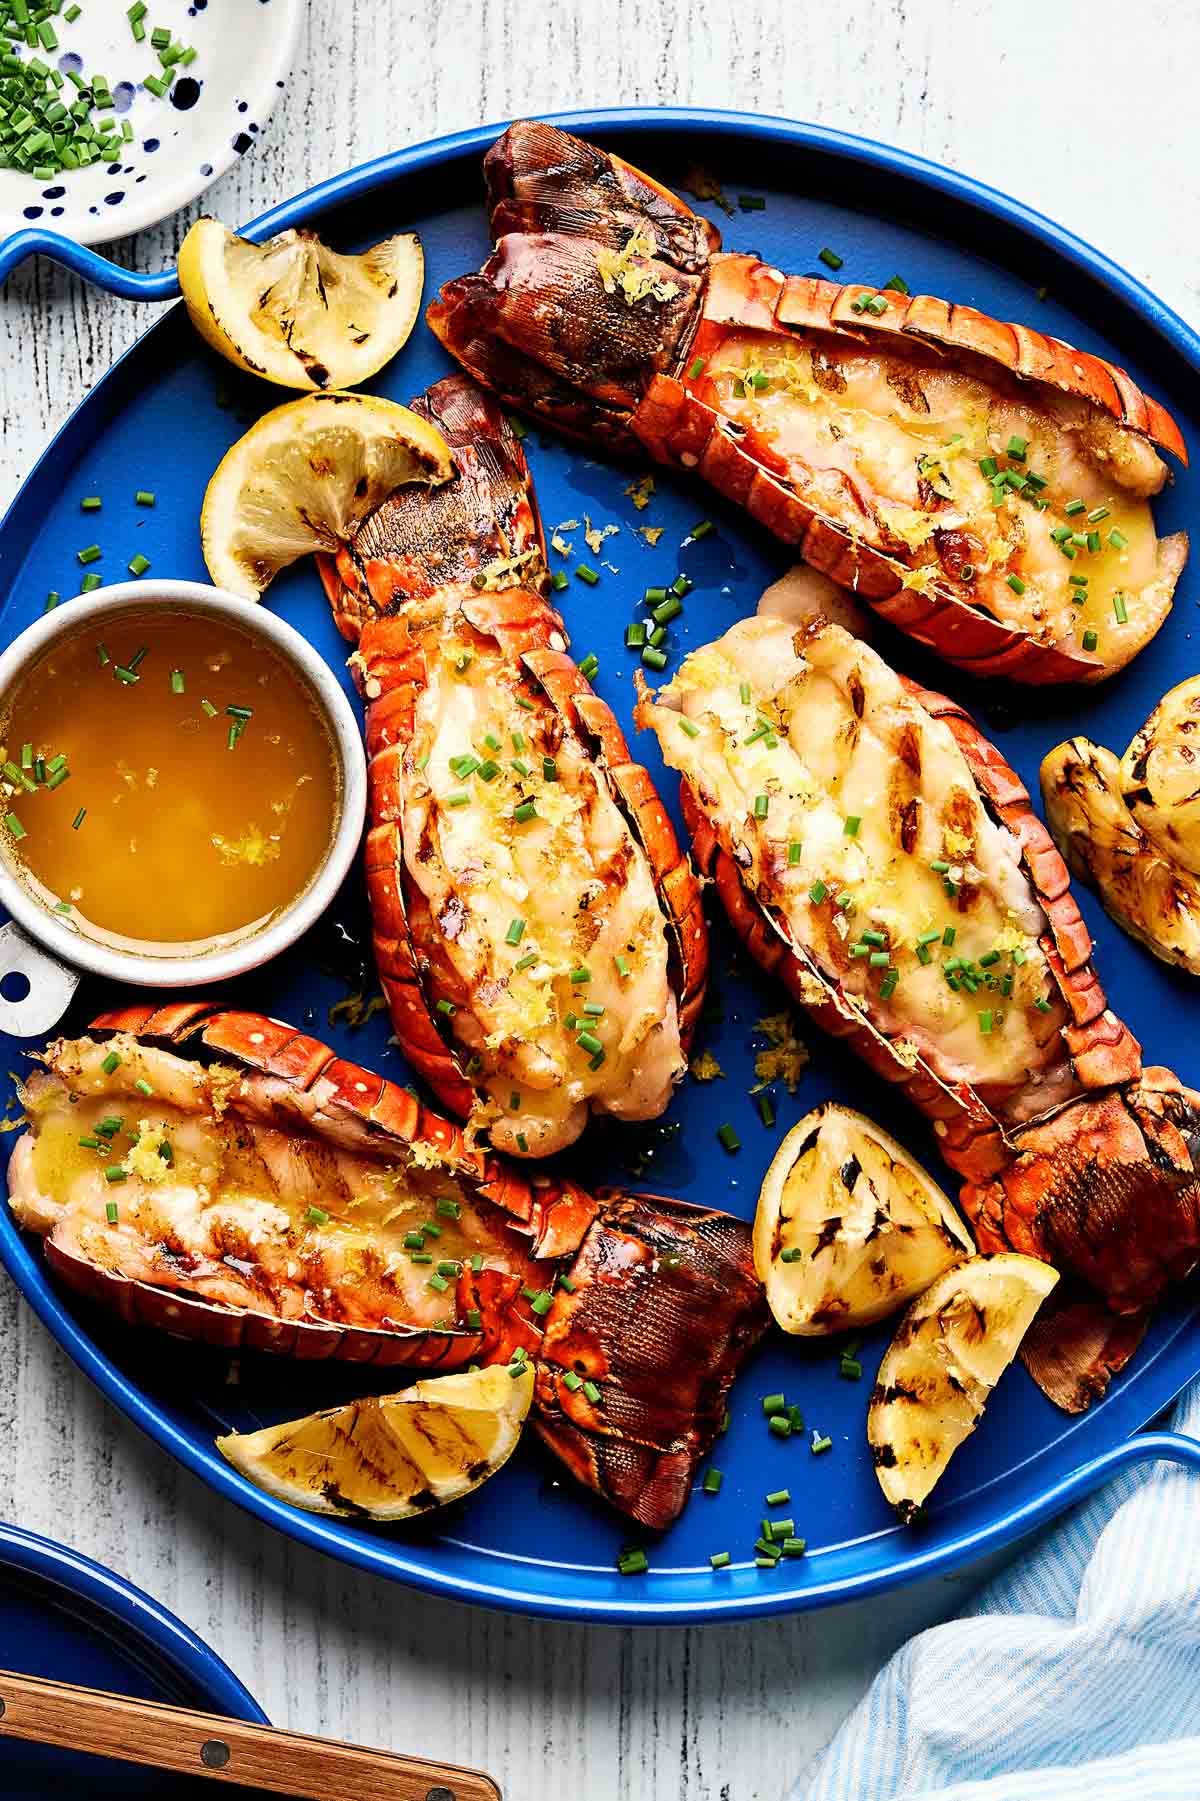
- Don't Forget Grilled Lemons: Halve a lemon and place it cut-side down on the grill for the last few minutes of cooking. The charring intensifies its flavor, making for a fantastic garnish and squeeze of fresh juice over the finished lobster.
- Rest Before Serving: Like any cooked protein, letting the lobster tails rest for 2-3 minutes off the grill allows the juices to redistribute, ensuring maximum tenderness.
- Garnish and Serve: A sprinkle of fresh chopped chives or parsley adds a lovely touch of color and freshness. Serve immediately with any remaining lemon garlic butter for dipping.
With this simple method, you’re not just grilling lobster tails; you’re crafting an unforgettable dining experience. It’s elegant, delicious, and astonishingly easy – truly a dish that makes you feel like a master chef without the usual fuss. For more insights on achieving professional results right in your kitchen, explore our guide on Restaurant-Quality Lobster Tails at Home: Simple & Affordable Guide.
There you have it – the definitive guide to mastering easy grilled lobster tails in just 25 minutes. From debunking the intimidation factor to selecting the best cold water lobster, preparing them for the grill, crafting that irresistible lemon garlic butter, and executing a flawless cook, every step is designed for success. This impressive dish is perfect for summer gatherings, special occasions, or simply treating yourself to a luxurious meal that’s far simpler to prepare than anyone needs to know. So fire up that grill, grab those lobster tails, and get ready to shine like the culinary rockstar you are!
